The article was first published in Advanced Usage of Chevereto V4: Mounting External Object Storage to Expand Storage Space, please indicate the source when reposting.
In this blog post, we will introduce how to mount external storage object storage in Chevereto V4. Chevereto is an open-source image hosting and sharing system that supports various storage options, including local storage and external object storage services. Since our image hosting platform often runs on VPS, when the capacity is not enough, we can expand the storage space of our image hosting platform through S3 object storage.
Prerequisites#
Before getting started, make sure you have completed the following steps:
- Have installed and configured Chevereto V4. (You can refer to my previous article # Teach You How to Use Docker to Install Chevereto V4 and Build Your Own Image Hosting Platform for installation and configuration instructions)
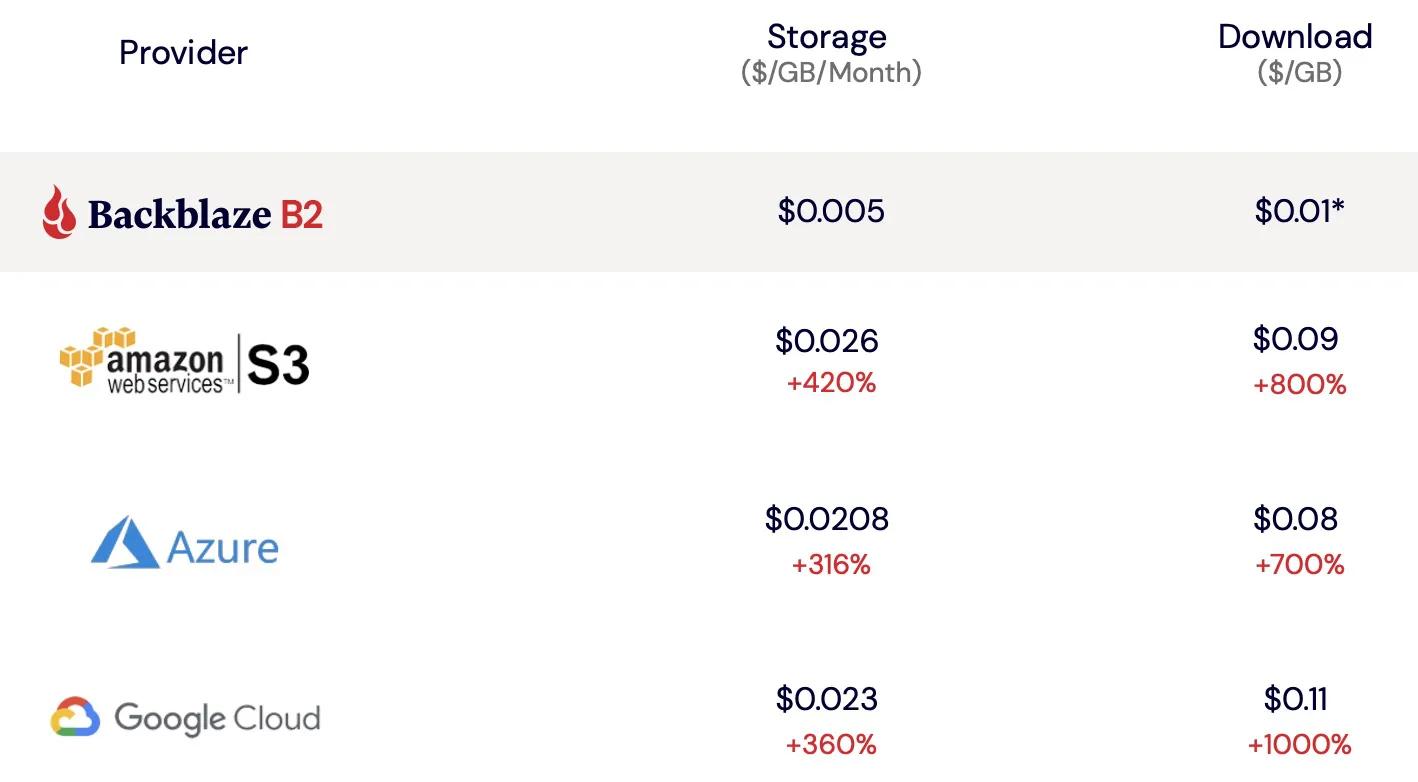
- Have an account for an external object storage service, such as Amazon S3, Google Cloud Storage, or DigitalOcean Spaces. Here, we will take Backblaze as an example, which is usually more cost-effective compared to big companies like Google.
Step 1: Register and Obtain Keys#
First, you need to obtain the access information for your S3 object storage service. This usually includes:
- API Endpoint URL of the storage service
- Access Key
- Secret Key
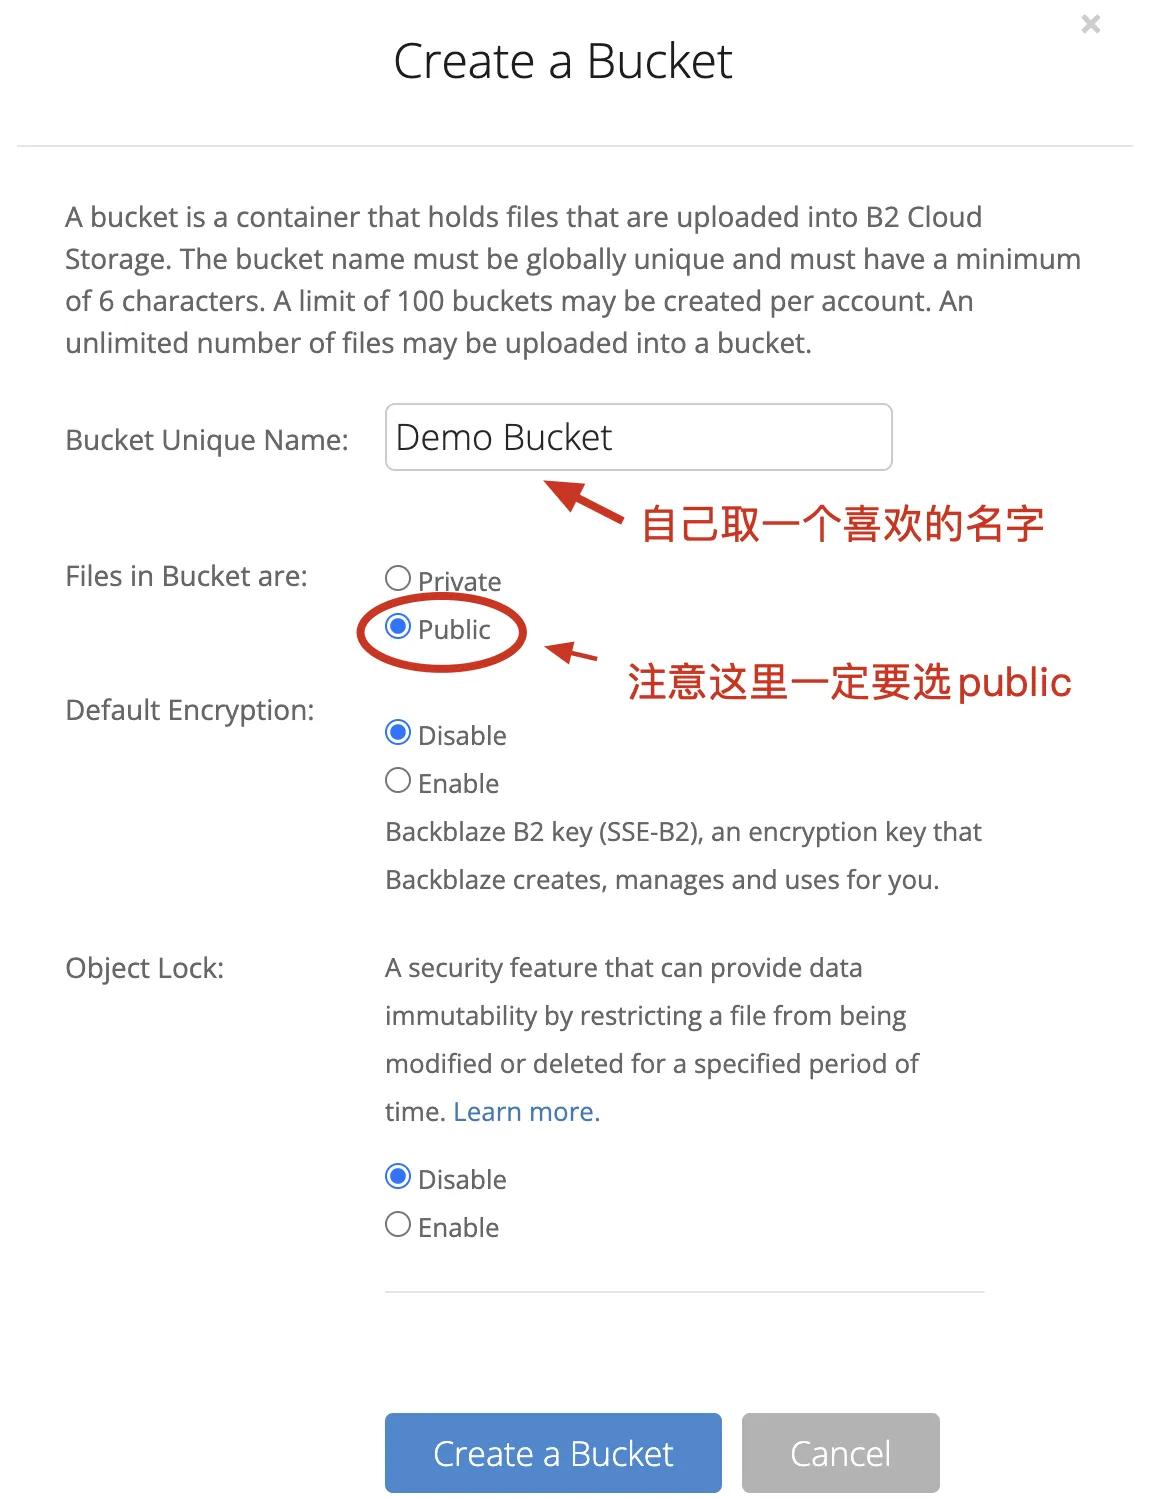
Taking Backblaze as an example, first go to the Backblaze official website to register for an account. After registration, you will have 10GB of free storage capacity. Then click on My Account to enter the backend management interface and create a new bucket.

When creating the bucket, enter a name you like in Bucket Unique Name, and make sure to check the second option Public. Otherwise, Chevereto will not be able to access the files in the object storage.
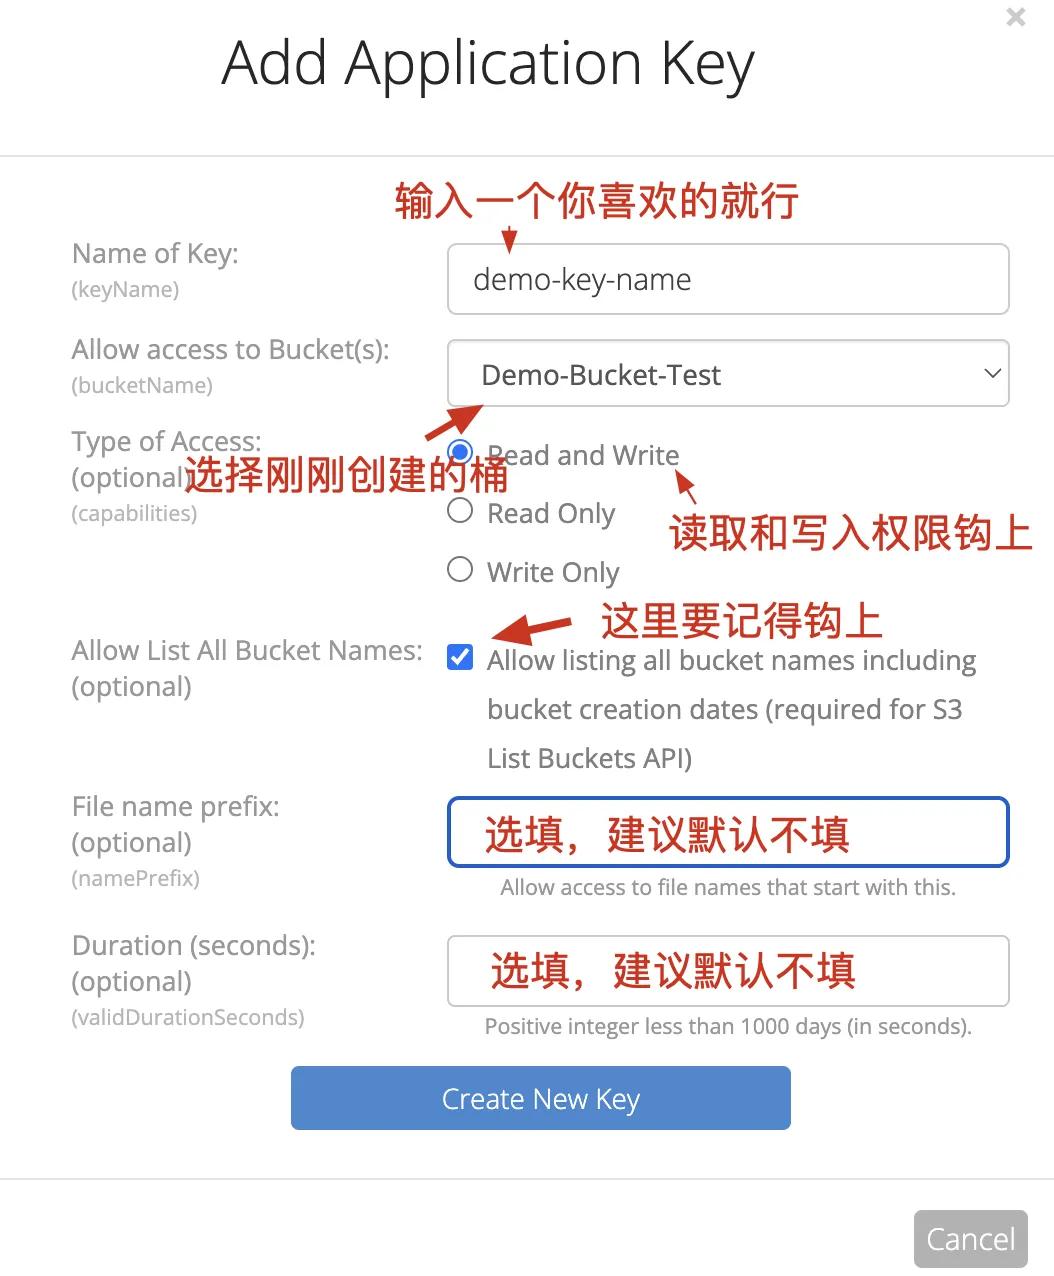
The next step is to create a new Application Key to obtain the operations and access permissions for the newly created bucket.

When creating the Application Key, make sure to grant both write and read permissions for Chevereto to operate on and access the images. Since we are mounting external storage through S3 storage, it is best to also check Allow List All Bucket Names.
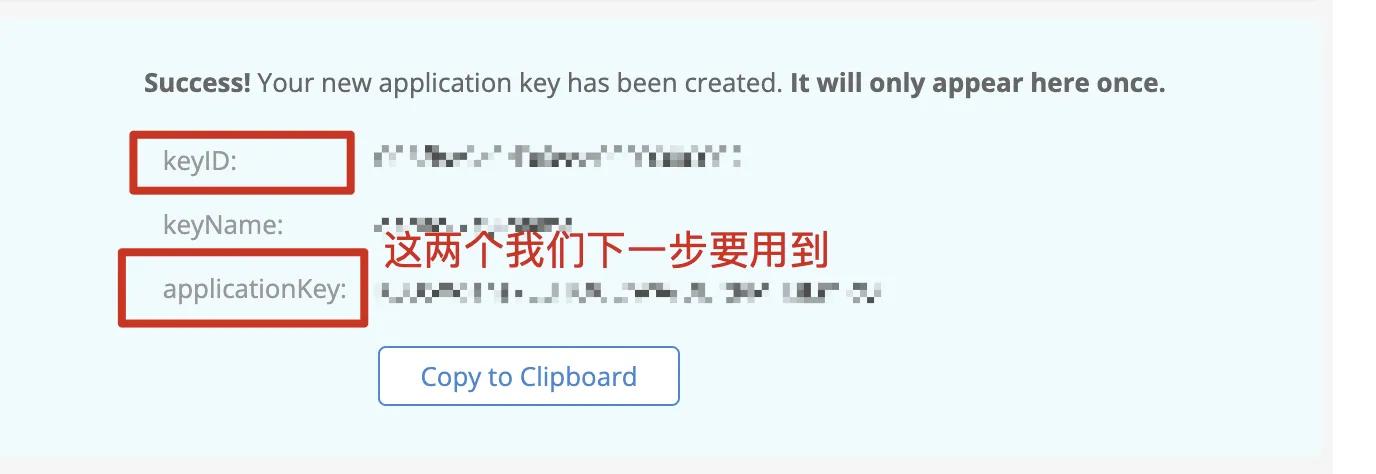
After creating it, you will be returned to the original webpage. A dialog box will pop up, and remember to take note of the keyID and applicationKey for the next step. If you leave this webpage, you won't be able to return and can only create a new Application Key.
Step 2: Configure Chevereto#
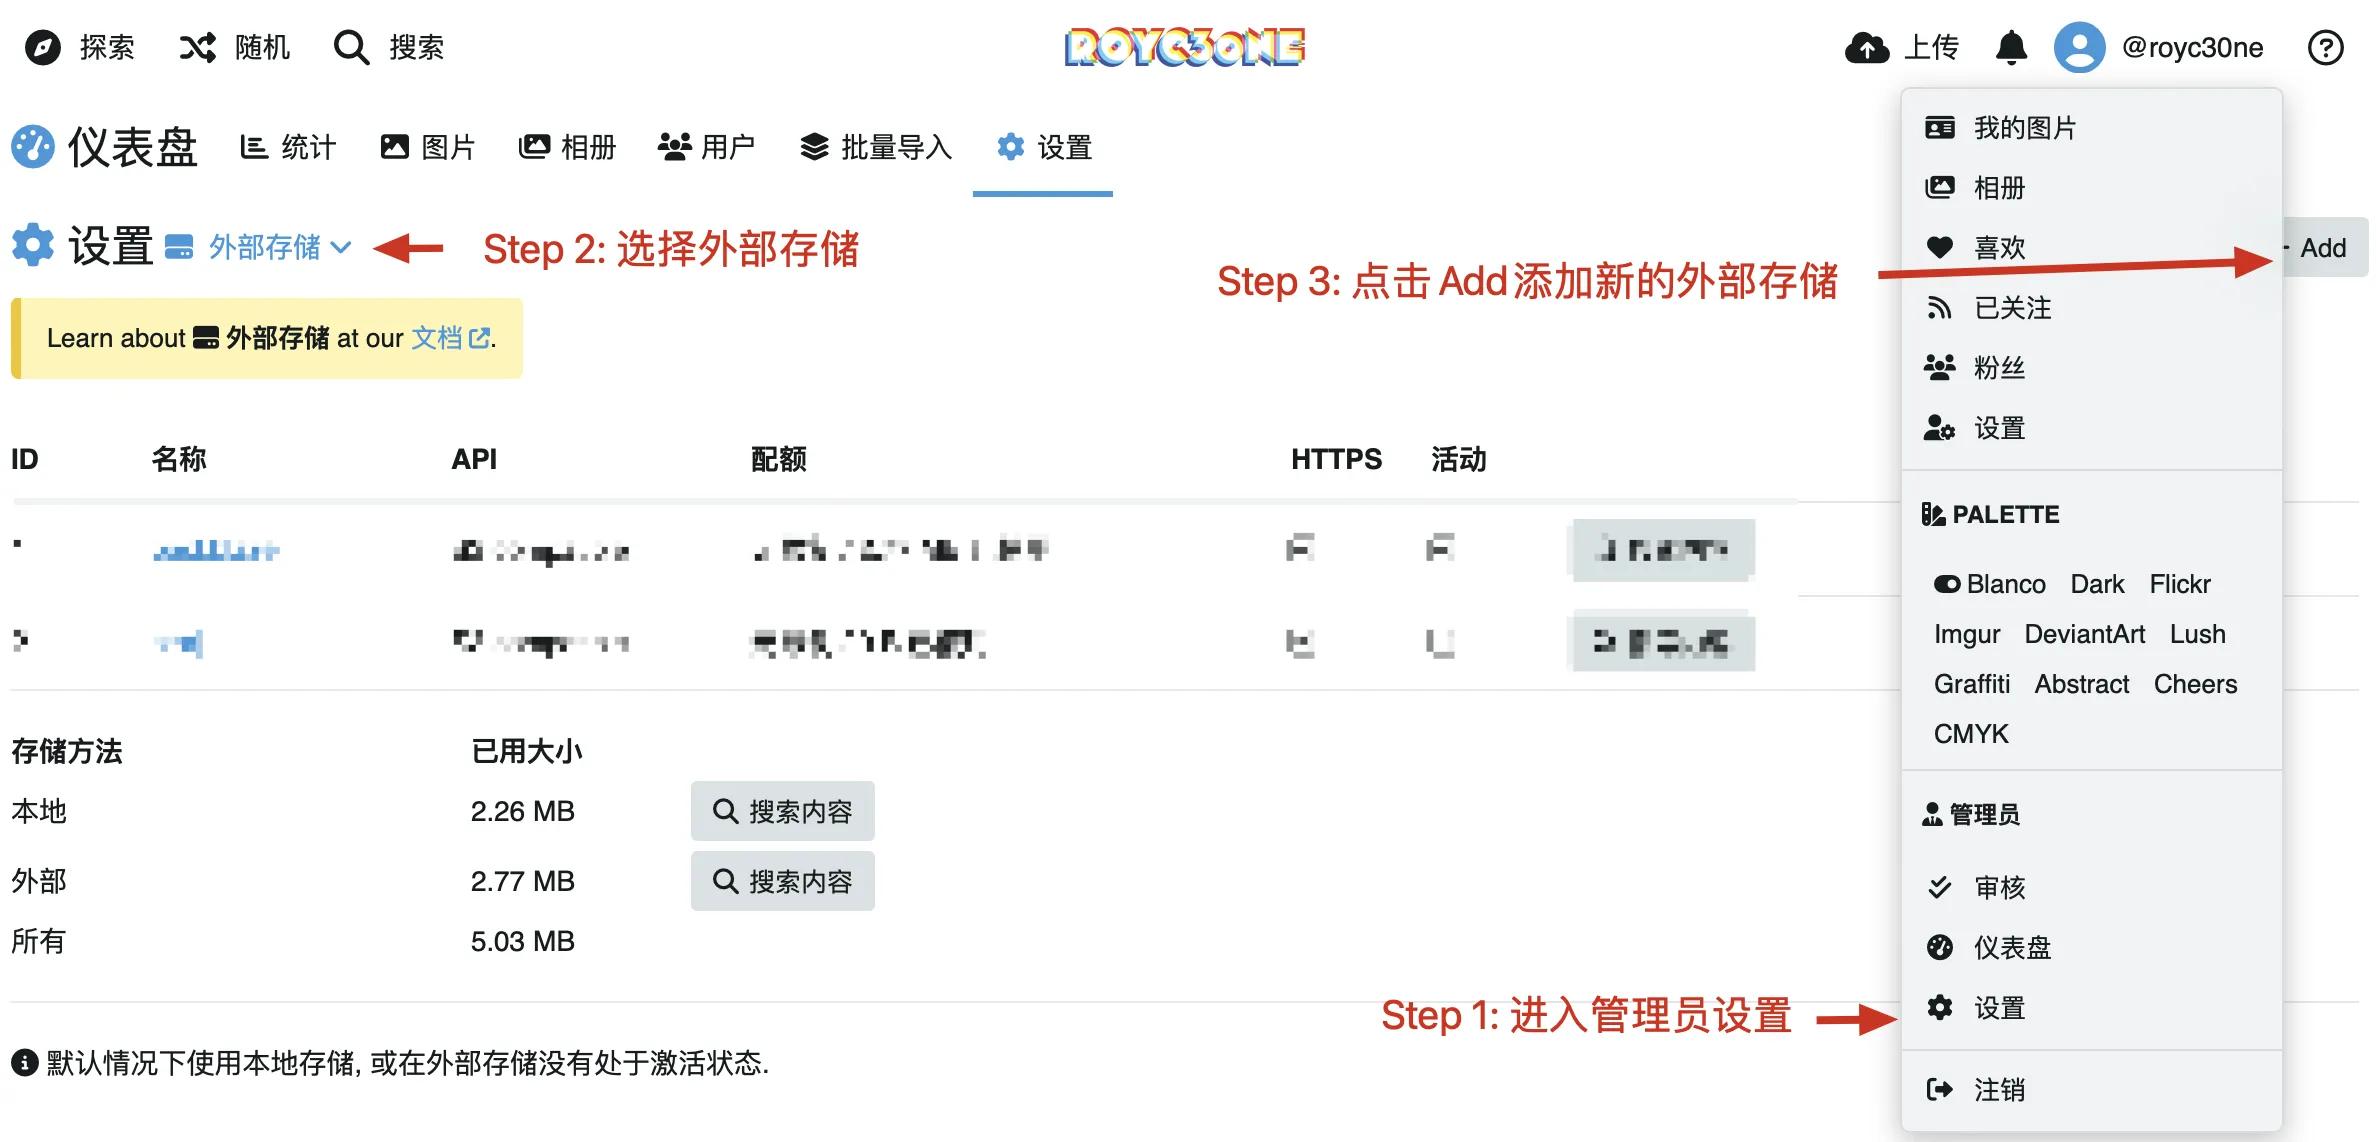
Open the Chevereto admin panel and navigate to Settings -> External Storage. In the External Storage section, click Add to add a new external storage.
In the dialog box that appears, you need to fill in the following information:
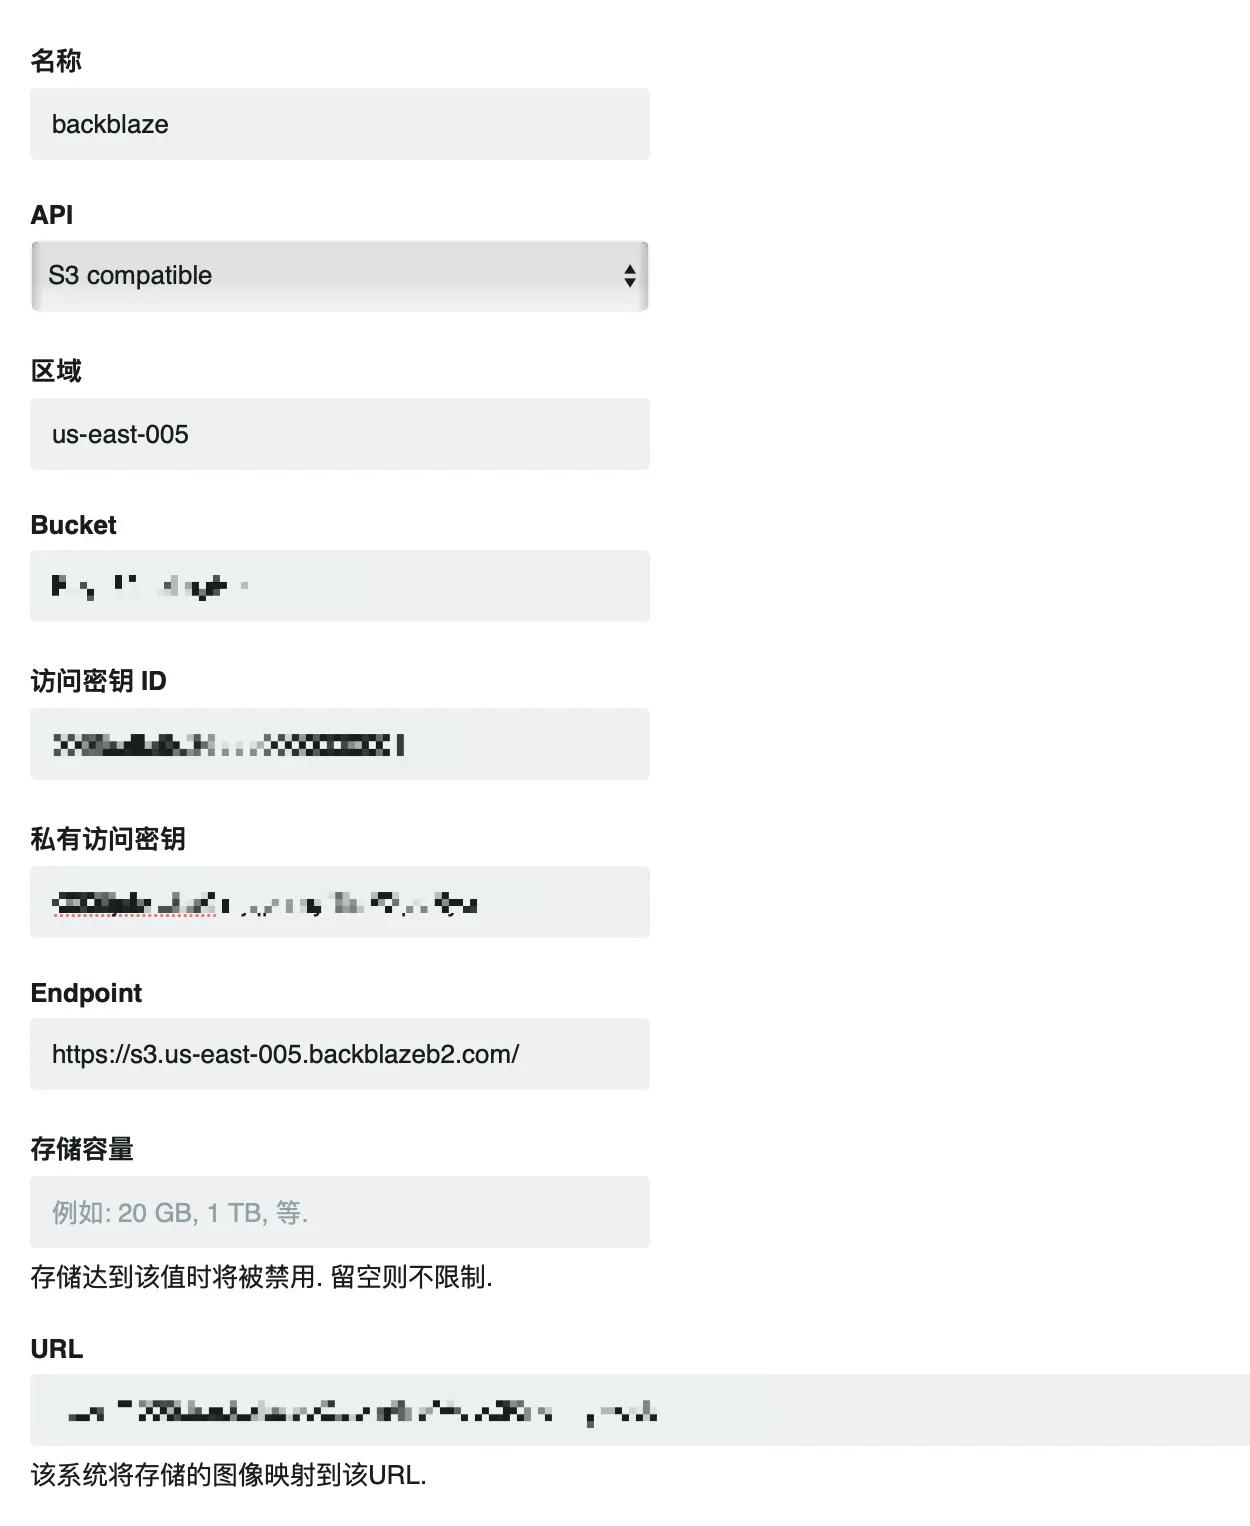
Storage Name: Customize a name you like.API: Here we use S3 object storage, so selectS3 compatible.Region: The storage region of the object storage.Bucket: The name of the storage bucket you want to use.Access Key: The Access Key of your storage service.Secret Key: The Secret Key of your storage service.Endpoint: The Endpoint of the storage service.URL: The URL of the storage.
I will tell you where to obtain these things. First, the keyID and applicationKey we obtained earlier correspond to the Access Key and Secret Key. Bucket is the name you gave to the bucket. You can see the EndPoint in the Backblaze backend as shown in the following image. The region is the second segment of the domain name, which is us-east-005 here.
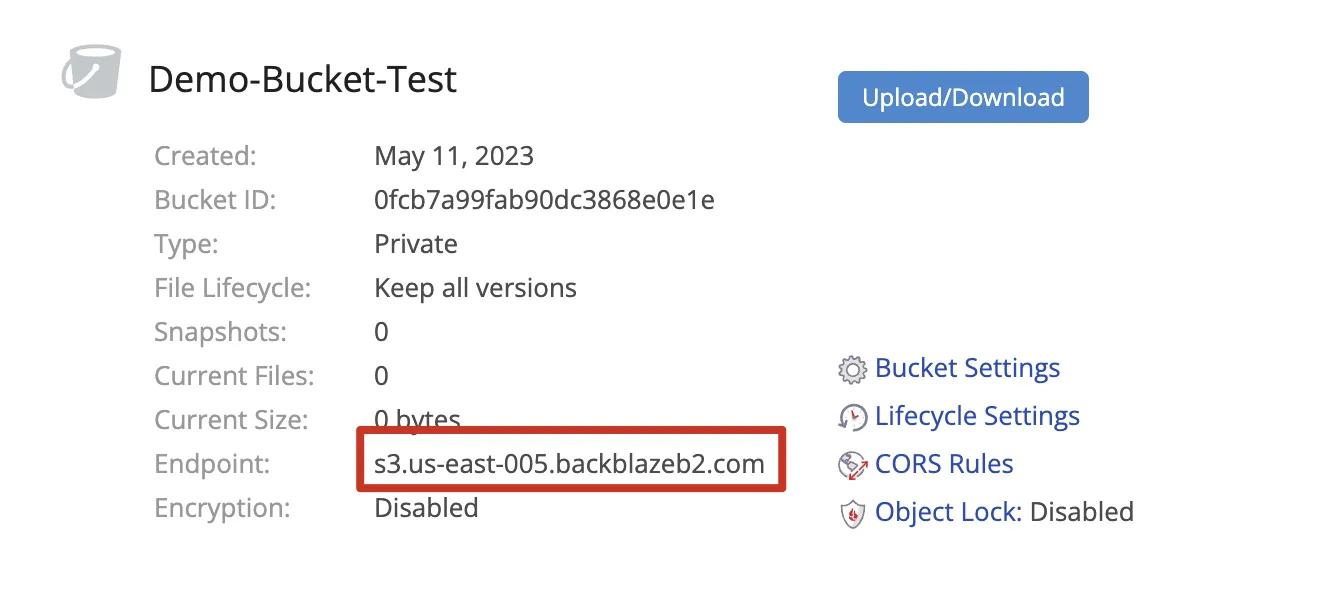
The URL is {https://} + Bucket ID + {EndPoint}, which is https://Demo-Bucket.s3.us-east-005.backblazeb2.com/ here.
Once you have filled in this part, the creation is successful. Return and check the Active column to start storing images in the object storage.
Step 3: Test Configuration#
After completing the configuration, you should see the storage you just added in the Settings -> External Storage section of Chevereto. You can upload a new image and go to the album. If the image is displayed correctly, it means you have successfully mounted the external storage object storage to Chevereto V4!
🎉Congratulations on your success!