The article was first published in 若绾 教你如何使用 Docker 安装 Chevereto V4 搭建属于自己的图床, please indicate the source when reposting.
The use of images is essential in the process of writing a blog. They can enrich the content of the article and enhance the reading experience of the audience. Building your own image hosting platform allows you to better manage and use image resources. Image hosting can compress and optimize images, reduce the file size of images, and speed up page loading. Fast-loading pages help improve user experience and reduce bounce rates. In addition, storing images on an image hosting platform can reduce the burden on your blog server, saving storage space and bandwidth. This way, your server can focus more on handling blog content and provide better performance.

Here I would like to recommend a very useful image hosting platform: Chevereto. Although there are other open-source image hosting software on the market, such as Lankong Image Hosting, Chevereto is the most mature and stable software I have used, and it also has support for many third-party plugins. Chevereto is divided into a free version and a Pro version. The Pro version has a one-time purchase fee of $75, but the free version is already sufficient for daily use. This time, the blogger will install the Pro version.
Preparation#
!! First of all, make sure that Nginx is not installed or running on your server. The Docker version of Chevereto will run Nginx, and the Docker version will conflict with the existing Nginx, causing it to fail to run (personally experienced).
- Prepare a VPS with a configuration of at least 1 core, 512M memory, and 10GB hard disk (advanced tutorials will tell you how to use object storage to expand storage space, so a smaller hard disk is fine).
- Prepare your own domain name and point your domain name to the server IP.
Domain Name Resolution#
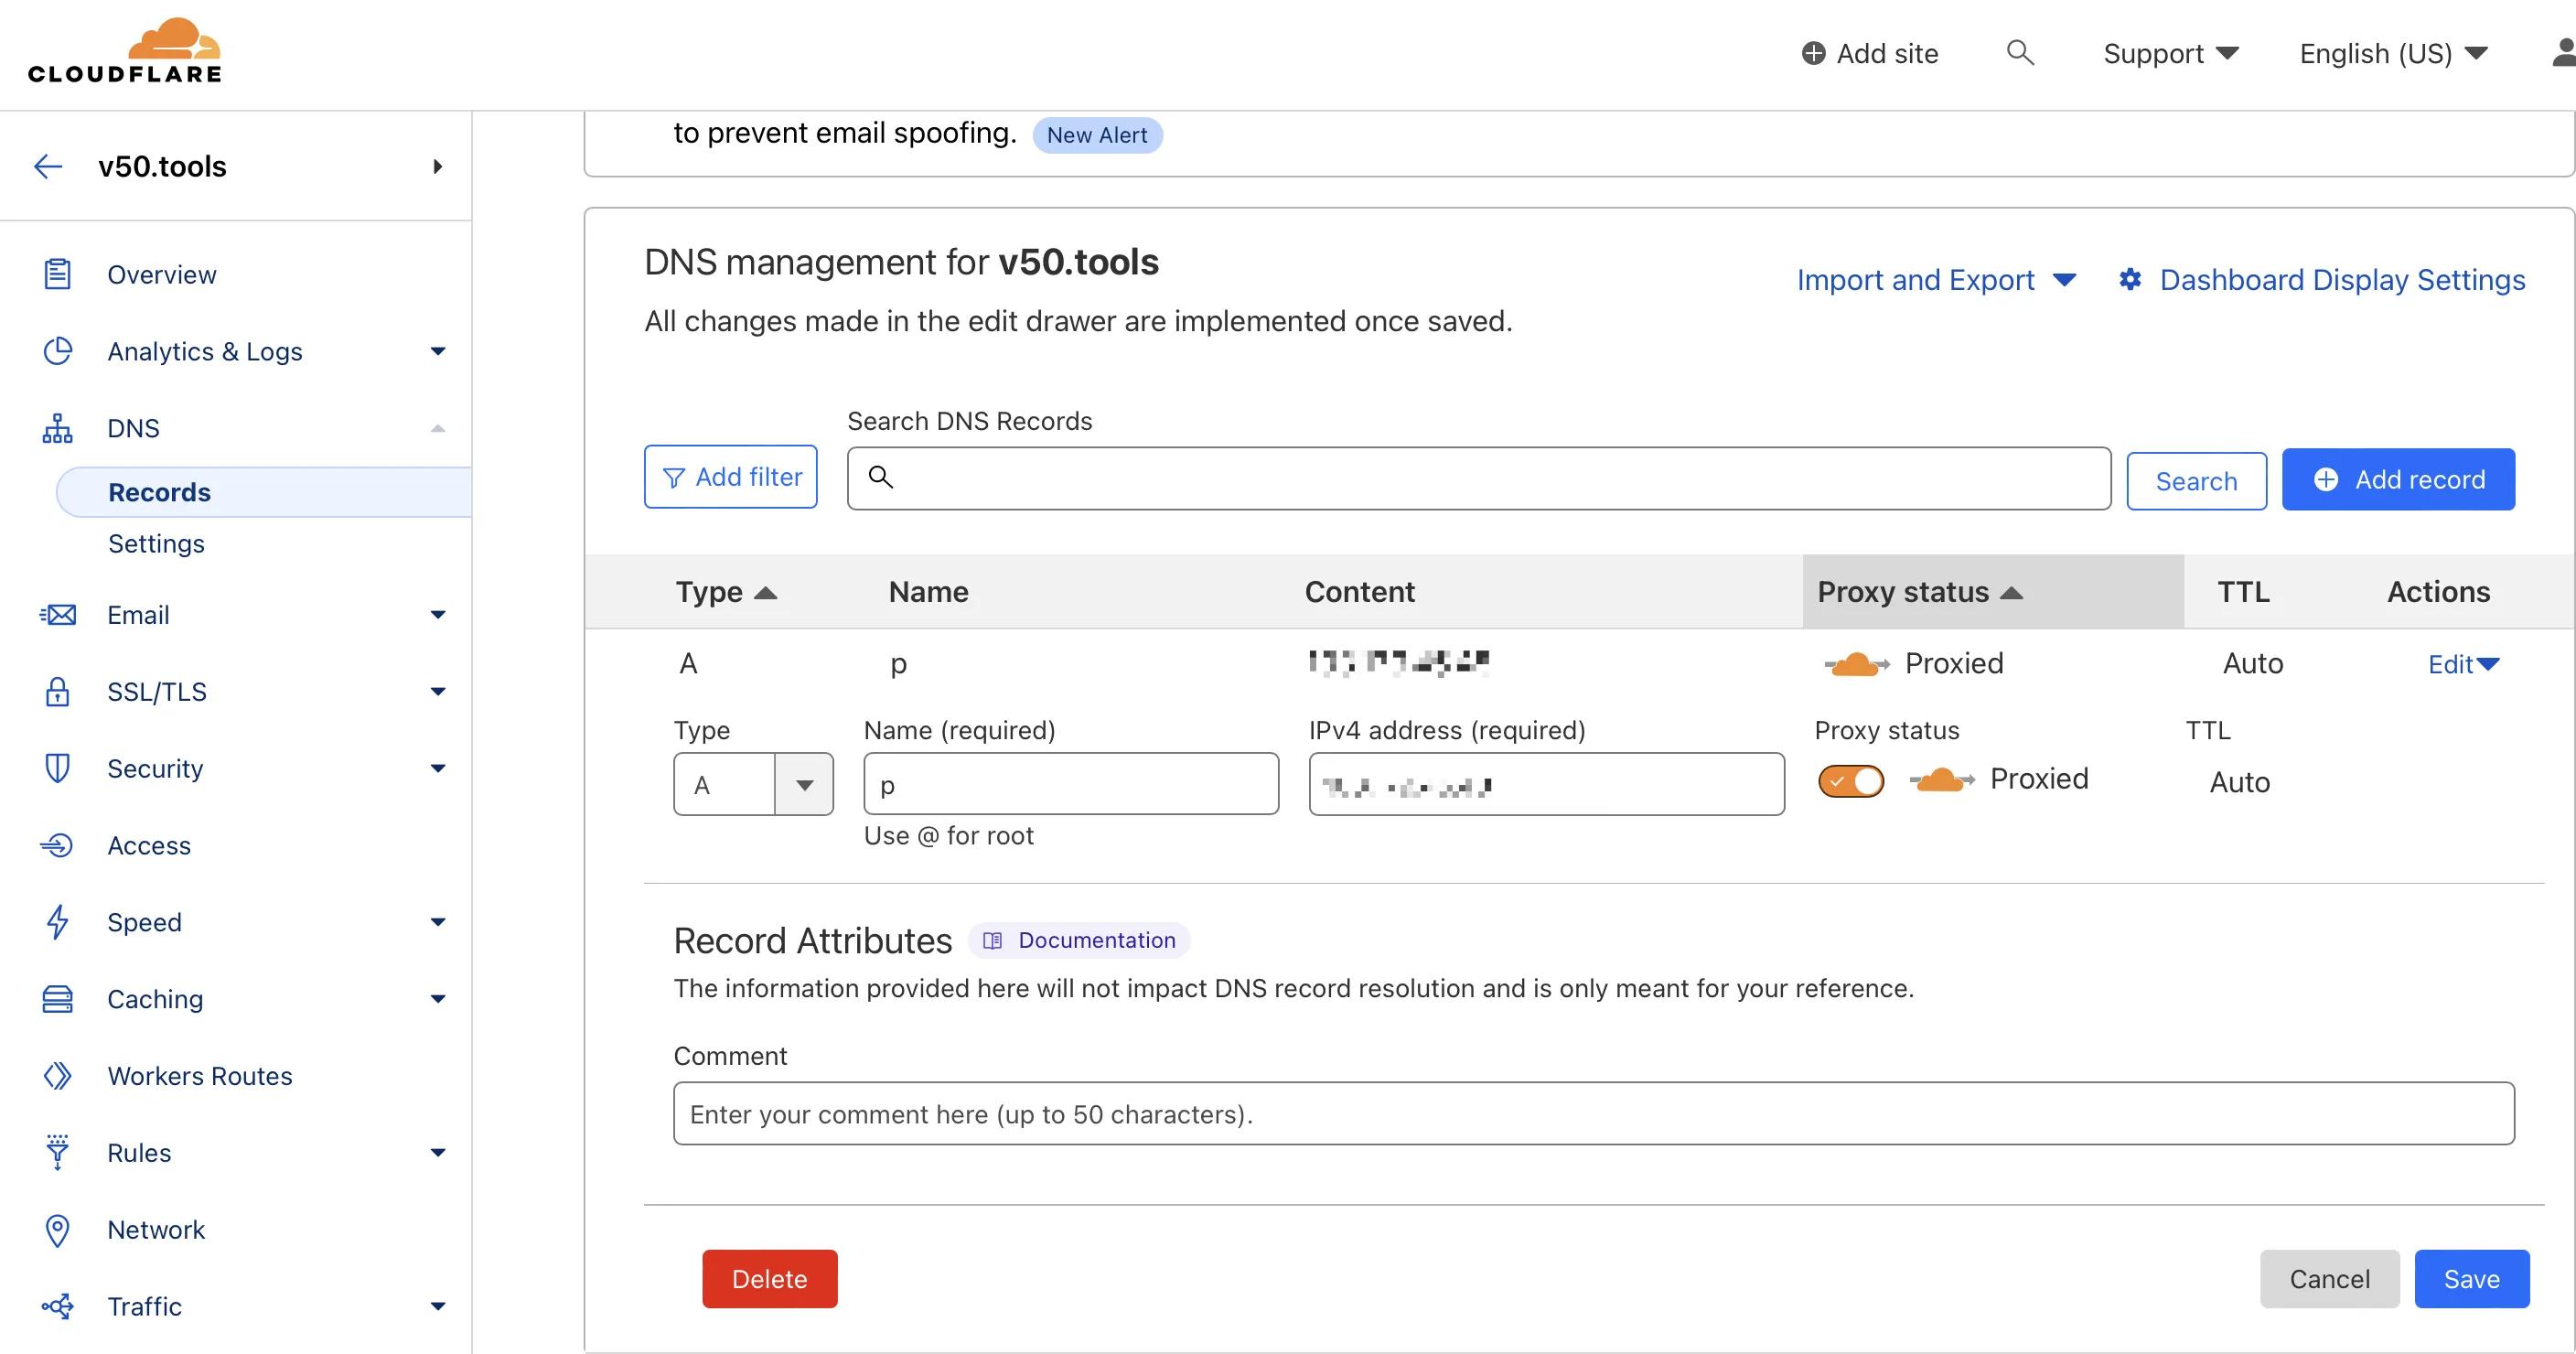
If you are using Cloudflare for domain name resolution, you can refer to the following figure to add a new A record for your domain name. Here, I will use p.2cu.icu as the domain name for my image hosting. If you want to use the Chevereto image hosting I have already set up, you are welcome to use V50 Image Hosting.
Environment Preparation#
Basic Environment#
Manage your server through the command line, and after entering your server via SSH, check if your server has make, unzip, curl, and git installed. If not, you can install them with the following command:
sudo apt install make unzip curl git
Install Docker (skip if already installed)#
If you are using Ubuntu, you can install Docker by running the following command (for other systems, please refer to the Docker official website):
Configure Repository#
- Update the
aptpackage index and install packages to allowaptto use a repository over HTTPS:
sudo apt-get update
sudo apt-get install ca-certificates curl gnupg
- Add the Docker official GPG key:
sudo install -m 0755 -d /etc/apt/keyrings
curl -fsSL https://download.docker.com/linux/ubuntu/gpg | sudo gpg --dearmor -o /etc/apt/keyrings/docker.gpg
sudo chmod a+r /etc/apt/keyrings/docker.gpg
- Set up the stable repository:
echo \
  "deb [arch="$(dpkg --print-architecture)" signed-by=/etc/apt/keyrings/docker.gpg] https://download.docker.com/linux/ubuntu \
  "$(. /etc/os-release && echo "$VERSION_CODENAME")" stable" | \
  sudo tee /etc/apt/sources.list.d/docker.list > /dev/null
Install Docker Engine#
- Update the
aptpackage index:
sudo apt-get update
- Install Docker Engine, containerd, and Docker Compose. To install the latest version, run:
sudo apt-get install docker-ce docker-ce-cli containerd.io docker-buildx-plugin docker-compose-plugin
- Verify that Docker Engine is installed correctly by running the
hello-worldimage:
sudo docker run hello-world
This command downloads a test image and runs it in a container. When the container runs, it prints a confirmation message and exits.
Clone chevereto/docker#
We will use git to get a copy of our base Docker project. By running the following command, a docker folder will be created in the current working directory.
git clone https://github.com/chevereto/docker.git
Go to this newly created docker folder.
cd docker
In the docker folder, you can configure or modify the basic configuration of Chevereto.
(Optional) Customize the Basic Configuration of Chevereto#
Chevereto supports a maximum of 64M for image uploads and 512M for memory usage by default, but you can modify them in the Dockerfile. Here are some basic configurations in the Dockerfile with comments to help you adjust them according to your needs.
Modify the Dockerfile with vim.
vim Dockerfile
Here are the relevant fields in the Dockerfile. I have added some comments to help you adjust them according to your needs.
    CHEVERETO_MAX_MEMORY_SIZE=512M \ # Maximum memory usage of Chevereto
    CHEVERETO_MAX_POST_SIZE=64M \  # Maximum limit of POST requests, it is recommended to set it the same as the maximum upload size
    CHEVERETO_MAX_UPLOAD_SIZE=64M \  # Maximum upload size
Set Up Background Tasks#
Chevereto needs to perform regular system tasks in the background, such as deleting expired images, unverified users, or checking for updates. Run the following command to set up background processing for all your websites.
make cron
Create an HTTPS Proxy#
The Docker version of Chevereto includes an NGINX network server that forwards access to all Chevereto websites and provides automatically updated HTTPS certificates.
To set up the proxy server, run the following command:
make proxy [email protected]
In the EMAIL_HTTPS option, set your email. It is required for HTTPS certificate notifications.
Create Chevereto Image (skip for the free version)#
This process will build the Chevereto container image.
💡 Skip this step when using the free version, as the image can be found here GHCR.
make image
This process will prompt you to provide a license key. If you have purchased the Pro version, you can find your key here (see the screenshot below for details).
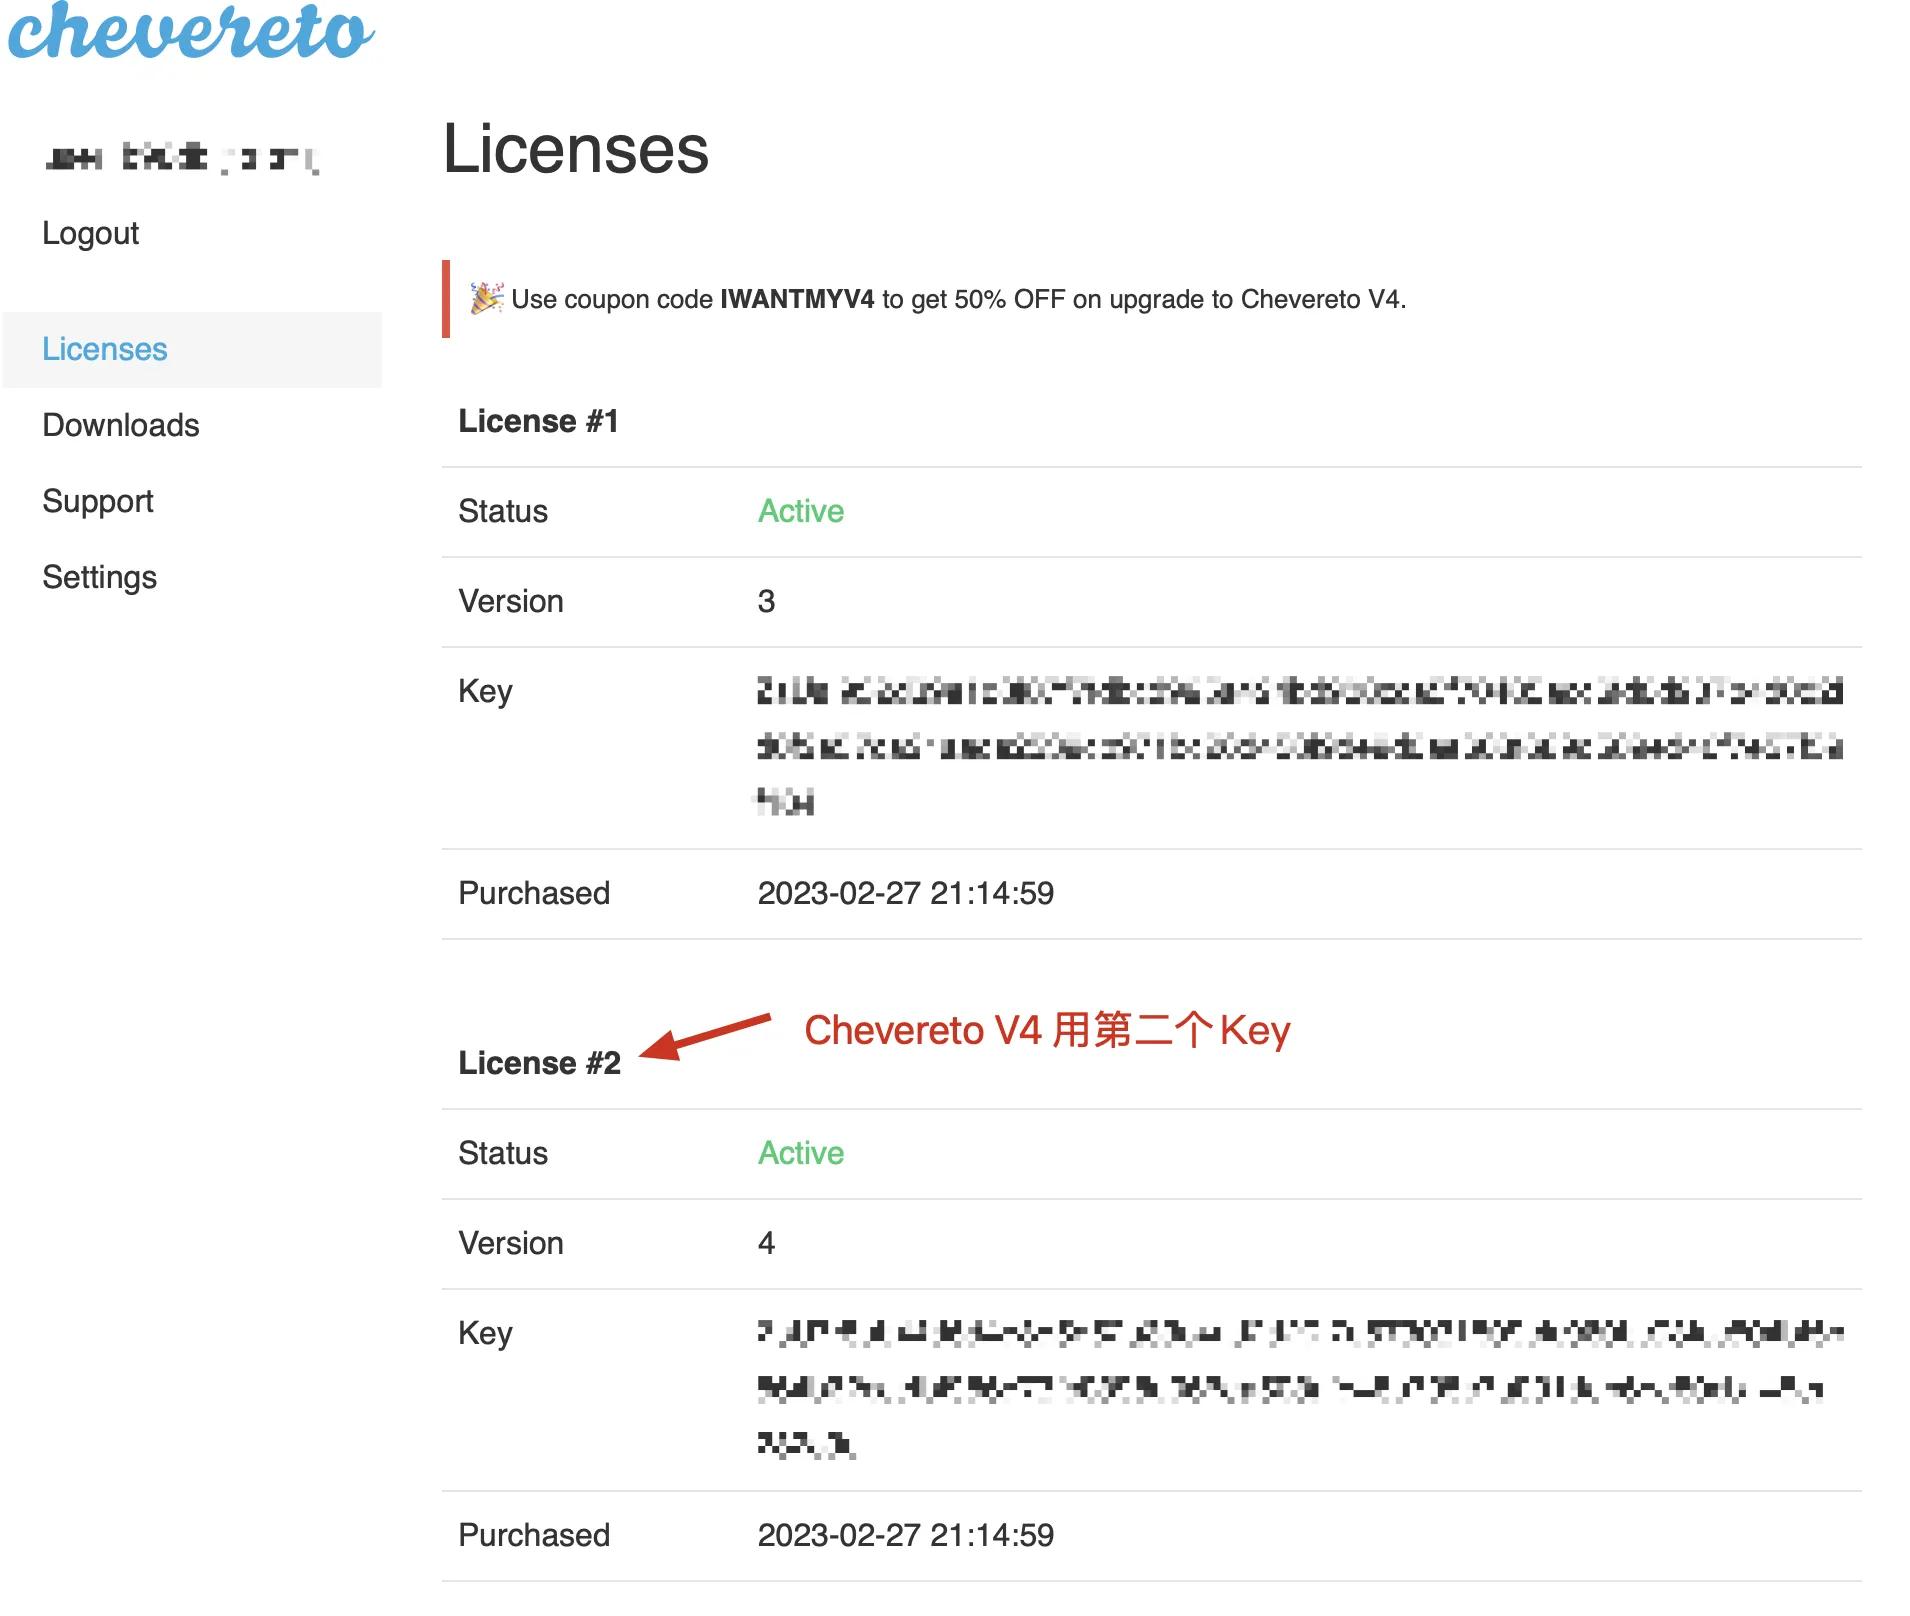
If no license is provided or an invalid license is entered, the system will build a free image.
Set Up Domain Name#
You can use the following command to create a namespace named imagehost for the p.v50.tools domain name (the namespace can be customized, but the HOSTNAME must be the domain name that resolves to your host IP address):
make namespace NAMESPACE=imagehost HOSTNAME=`p.v50.tools`
You can check the namespace file in the
./namespacefolder.
Run Chevereto Website#
Pro version: To create a new website, run the make spawn command with the NAMESPACE option.
make spawn NAMESPACE=imagehost
Free version: When using the free version, use EDITION=free.
make spawn NAMESPACE=example EDITION=free
🎉 Chevereto is now up and running, and you can access your own Chevereto image hosting through your domain name.